Table of Contents
I still remember the first time I made a cherry dump cake. It was one of those spontaneous baking afternoons where I just wanted to use up a pound of cherries that were about to turn. I didn’t have the time or energy for a pie, but I craved that same warm, gooey cherry comfort. So, I tossed together what I had, baked it up, and oh my goodness, that first spoonful was like biting into summer. Juicy cherries, a golden buttery topping, and all the flavor of a pie without the pie-making effort.
Since then, this has become my go-to when cherries are in season or when I want an easy dessert that everyone will rave about. It’s perfect for last-minute guests, a cozy weekend treat, or even a fun dessert-for-breakfast moment. And the best part? You don’t need to be a skilled baker to nail this recipe. It’s practically foolproof.
If you’ve never made a cherry dump cake before, this is your moment. It’s simple, satisfying, and bursting with fresh cherry flavor.
Why You’ll Love This Recipe
- Easy to assemble with just a few ingredients
- Loaded with juicy fresh cherry flavor
- Tastes amazing warm, chilled, or room temperature
- Works well with fresh, frozen, or canned cherries
- Can be customized with spices or extracts
- Pairs beautifully with ice cream or whipped cream
- Bakes in one dish with minimal cleanup
- Stores well and freezes beautifully
- A cozy crowd-pleaser for any season
Ingredients
Here’s what you’ll need to make this rustic cherry dump cake. Full measurements are in the recipe card below.
Fresh cherries Sweet cherries work best. I use fresh when they’re in season, but thawed frozen or well-drained canned cherries are great too.
Sugar Brown or white sugar can be used. Brown sugar adds richness while white keeps it classic. I sometimes use both.
Lemon juice Adds brightness and balances the sweetness of the cherries.
Cornstarch Thickens the cherry filling just enough to give it that perfect scoopable texture.
Yellow cake mix Provides the topping. It bakes into a soft but crisp crust over the bubbling fruit. White or vanilla cake mix also works.
Butter Melted and mixed into the cake mix. I prefer unsalted so I can control the seasoning.
Optional flavorings Vanilla extract, almond extract, or cinnamon can be added to the cherry filling to enhance flavor. A little goes a long way.
Prep tip: Pit and prep the cherries in advance to make the bake day quick and easy.
How to Make Cherry Dump Cake
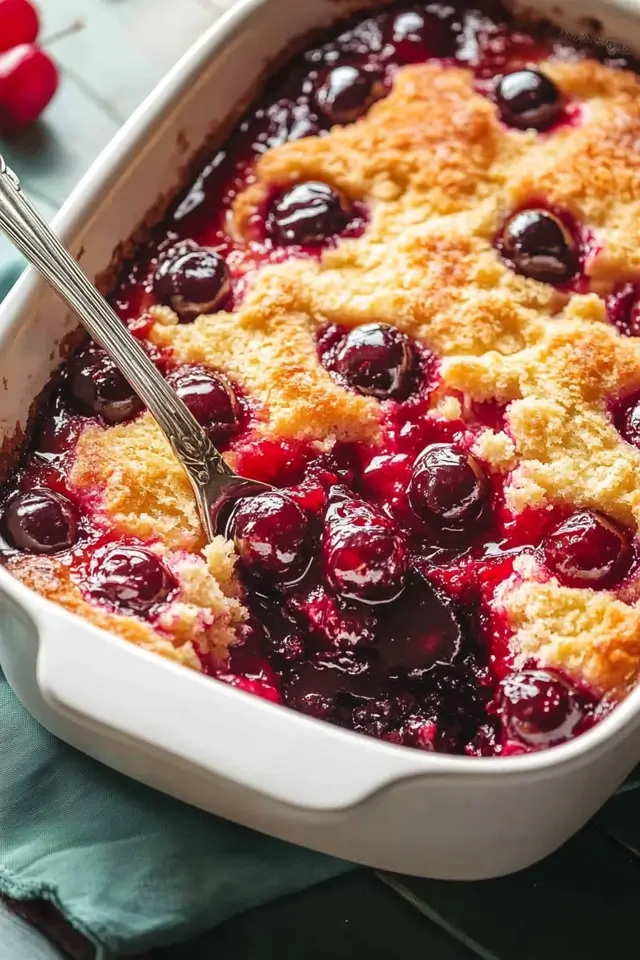
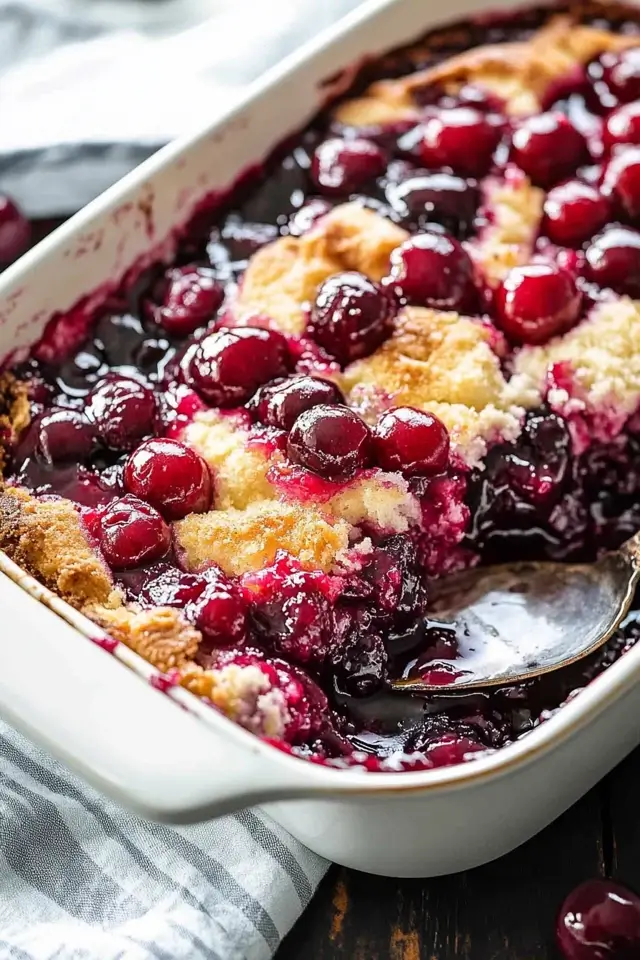
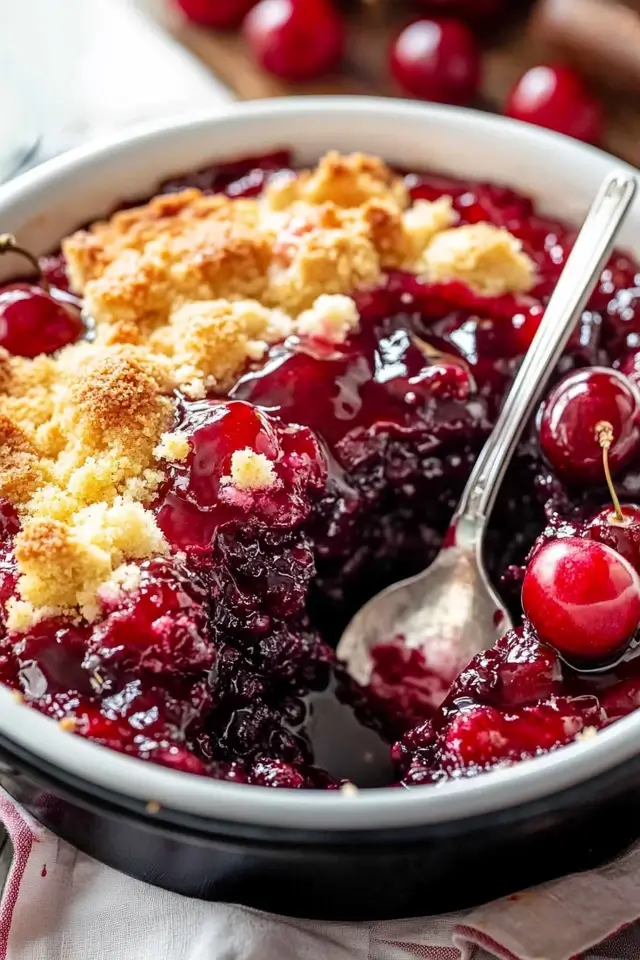
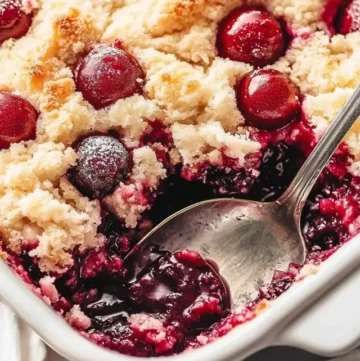
Start by preheating your oven to 350°F. Lightly grease an 8×11-inch or 9-inch baking dish.
In a saucepan, combine the cherries, lemon juice, and sugar. Cook gently until the juices start to release. In a small bowl, dissolve the cornstarch in water, then add to the cherry mixture while stirring. Cook briefly until slightly thickened. Remove from heat and pour into the prepared baking dish.
In another bowl, mix the dry cake mix with melted butter until crumbly. Sprinkle the mixture evenly over the cherry filling. Do not stir.
Bake for 40 to 45 minutes, or until the top is golden and the cherry filling bubbles at the edges. Let it cool slightly before serving.
Pro Tips
- Drain frozen cherries to avoid excess moisture
- A little almond extract enhances the cherry flavor
- Don’t overbake, check the topping by gently lifting with a spoon near the end
- For texture, sprinkle chopped nuts or oats over the topping before baking
- Let rest before serving for the best texture
Recommended Equipment for This Recipe
- Cherry pitter
- Medium saucepan
- Mixing bowls
- 8×11 or 9-inch baking dish
- Spatula and whisk
Serving Suggestions
- Serve warm with vanilla ice cream and extra cherry syrup
- Try it chilled with a dollop of whipped cream
- Enjoy with Greek yogurt for a sweet breakfast treat
Storage and Make-Ahead Tips
- Store covered in the fridge for up to four days
- Reheat in the oven or microwave before serving
- Freeze in an airtight container for up to one month
- Thaw overnight and warm before enjoying
Closing Thoughts
This cherry dump cake is that dessert I turn to again and again when I want comfort without the fuss. It’s buttery, juicy, and filled with flavor in every bite. Whether you’re baking for a crowd or just treating yourself, this simple cake is guaranteed to satisfy.
Don’t forget to check the recommended tools above to make your baking even easier.
FAQs
Can I use other fruits? Yes, try peaches, blueberries, or a mix of berries. Adjust sugar depending on the fruit.
Is it okay to make it gluten-free? Yes, use a gluten-free cake mix and confirm all other ingredients are gluten-free.
Can I make it without cake mix? Yes, use a mix of flour, sugar, and baking powder as a homemade alternative.
Is it very sweet? It’s sweet, but the lemon juice helps balance it. You can also reduce sugar slightly.
Can I prep it ahead of time? Yes, prep the filling in advance and refrigerate. Assemble and bake when ready.
Fresh Cherry Dump Cake
Equipment
- Medium Saucepan
- 8×11-inch Baking Dish (or 9-inch square)
- Mixing Bowls
- Whisk or Spoon
- Measuring Cups and Spoons
- Small Bowl for Slurry
- Oven
Ingredients
For the homemade cherry pie filling
- 1.5 pounds whole cherries fresh preferred, frozen okay (see notes)
- 4 tbsp brown or white sugar
- 4 tbsp lemon juice
- 4 tbsp water
- 2 tsp cornstarch
- optional flavorings almond or vanilla extract, cinnamon (see notes)
For the topping
- 2 cups yellow cake mix see notes for alternatives
- 0.5 cup unsalted butter melted
Instructions
- Preheat the oven to 350°F (180°C). Grease an 8×11-inch or 9-inch square/round baking dish.
- Wash, pit, and halve the cherries. Place them in a medium saucepan with sugar and lemon juice. Cook over medium heat.
- In a small bowl, dissolve cornstarch in water completely. Slowly stir the slurry into the cherry mixture while cooking. Cook 1 minute after boiling to thicken.
- Pour cherry filling into the prepared baking dish and spread evenly.
- In a bowl, mix cake mix with melted butter until crumbly. Sprinkle evenly over cherry filling—do not stir.
- Bake for 40–45 minutes until golden brown and bubbly around the edges. Check doneness by lifting part of the topping gently to ensure it’s baked through.
- Serve warm plain or topped with whipped cream or vanilla ice cream. Store leftovers in fridge up to 4 days or freeze up to 1 month.
Notes
Frozen Cherries: Use thawed and drained cherries; do not overcook.
Storage: Keep in refrigerator or freeze up to 1 month.
Ratio Tip: Less topping creates a better crisp texture.

Leave a Reply