Table of Contents
these Chicken Caesar Wraps saved my lunch game more times than I can count.I will be honest with you There is something about wrapping up a classic Caesar salad with juicy chicken inside a soft tortilla that just feels right, especially on those busy days when you want something fresh but still filling. I first whipped these up on a hectic work-from-home day when I didn’t feel like making a full meal but wanted something better than a boring sandwich. And now? They are on regular repeat in my kitchen!
Why You’ll Love Chicken Caesar Wraps
- Quick and Easy: Ready in just 15 minutes.
- Fresh and Flavorful: Crunchy lettuce, juicy chicken, creamy dressing, and cheesy goodness all wrapped up.
- Perfect for Meal Prep: Make everything ahead and assemble when ready.
- Family Approved: Kids love it, adults love it, everyone wins.
- Customizable: Add your favorite Caesar ingredients or extras.
Ingredients for Chicken Caesar Wraps
Here is everything you need to make these wraps a success:
- Chopped romaine lettuce
- Cooked chicken (grilled, fried, or rotisserie all work perfectly)
- Caesar dressing (store-bought or homemade)
- Freshly grated Parmesan cheese
- Homemade croutons
- Kosher salt and freshly ground black pepper
- Flour tortillas or wraps (about 10-inch size)
(Exact measurements are in the recipe card below!)
How to Make Chicken Caesar Wraps
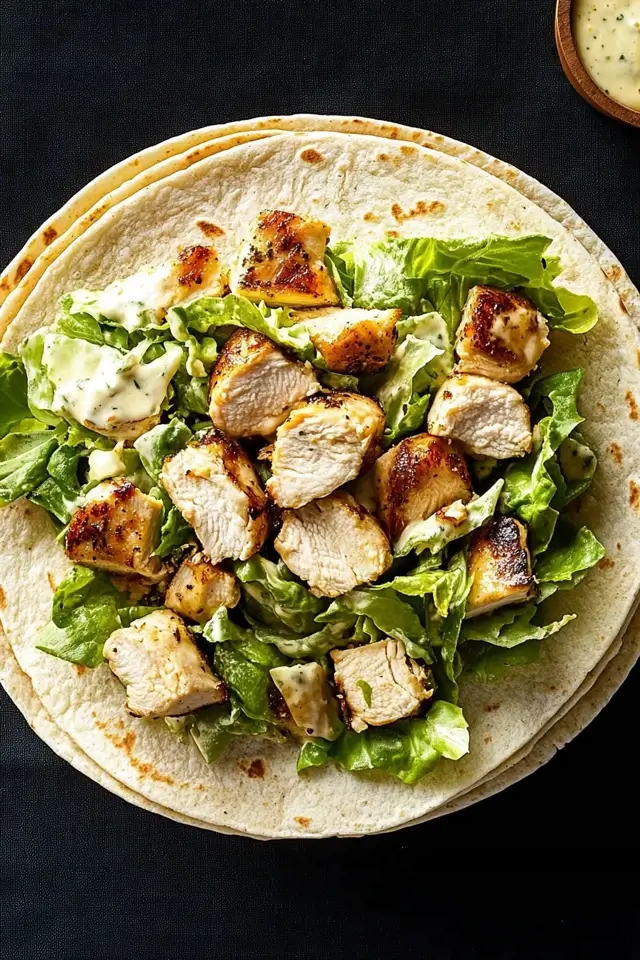
Step 1: Mix the Filling
In a large bowl, combine chopped romaine, cooked chicken, Caesar dressing, Parmesan cheese, and croutons. Toss everything together using tongs so that the dressing coats every bite. Season with salt and pepper to taste.
Step 2: Warm the Tortillas
Warm the tortillas in a dry skillet over medium heat for 15-30 seconds per side until soft and pliable. Alternatively, you can warm them in the microwave between paper towels for about 20 seconds.
Kitchen Tip: Warming the tortillas makes them easier to fold without cracking!
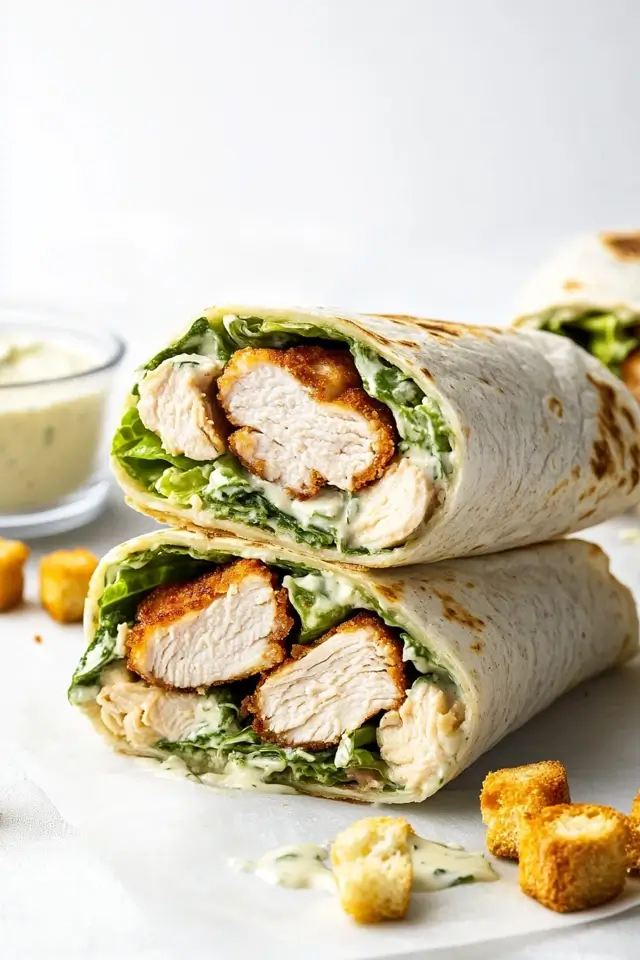
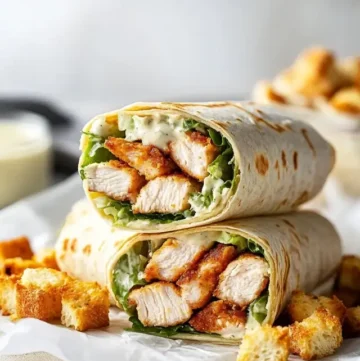
Step 3: Assemble the Wraps
Place the tortilla on a clean surface. Spoon the Caesar salad mixture into the center. Fold in the sides of the tortilla, then roll it up burrito-style. Secure with a toothpick if needed.
Step 4: Serve and Enjoy
Slice the wraps in half for easier handling, or leave them whole. Serve immediately and enjoy that perfect balance of crunch, creaminess, and flavor!
Pro Tips for Perfect Chicken Caesar Wraps
- Use Fresh Lettuce: It keeps the wrap crisp and refreshing.
- Rotisserie Chicken Shortcut: Makes this meal even faster.
- Control Dressing Amount: Start with less dressing and add more as needed.
- Toasted Tortilla: Lightly grill or toast the wrap for a slightly crispy finish.
Recommended Equipment for This Recipe
Here are a few of my favorite kitchen tools to make Chicken Caesar Wraps even easier to prepare:
- Salad Spinner, perfect for washing and drying lettuce quickly.
- Non-Stick Skillet, ideal for warming tortillas evenly.
- Chef’s Knife, makes chopping lettuce and chicken fast and easy.
- Mixing Bowls Set, great for tossing your Caesar salad mixture.
- Tortilla Warmer, keeps your tortillas soft and ready to roll.

Serving Suggestions
- Easy Lunch: Pair with fresh fruit or a small soup on the side.
- Light Dinner: Serve with sweet potato fries or a cucumber salad.
- Picnic or On-the-Go: Wrap them tightly in foil for a perfect portable meal.
Storage & Make-Ahead Tips
- Store the salad mixture separately in the fridge for up to 2 days.
- Warm tortillas just before assembling for best texture.
- Fully assembled wraps are best eaten fresh, but can be stored tightly wrapped in the fridge for 1 day.
Variations of Chicken Caesar Wraps
- Add Bacon: Crumbled bacon takes these wraps to the next level.
- Spicy Version: Add sliced jalapeños or a drizzle of hot sauce.
- Low Carb: Use lettuce leaves instead of tortillas.
- Vegetarian Option: Swap chicken for chickpeas or grilled tofu.
Closing Thoughts
Chicken Caesar Wraps are the kind of meal I always turn to when life gets busy but I still want something fresh and satisfying. They are so easy to customize, super quick to throw together, and taste like a little upgrade to your usual lunch routine. Whether you are packing them for work, serving them for dinner, or just craving something delicious, these wraps never disappoint.
Don’t forget to check the recommended tools above to make your cooking even easier and more fun!
Frequently Asked Questions (FAQs)
Can I make these wraps ahead of time? It is best to prep the filling ahead and assemble the wraps right before eating so they stay fresh and crisp.
What is the best chicken to use? Grilled, rotisserie, or even leftover roasted chicken all work perfectly.
Can I use a different dressing? Absolutely. Ranch or even a light vinaigrette would taste great too.
How do I keep the wraps from falling apart? Warming the tortillas helps make them more flexible. Rolling tightly and using a toothpick also helps.
Can I make these wraps gluten-free? Yes, just use gluten-free tortillas and make sure your croutons and dressing are gluten-free too.
Chicken Caesar Wraps
Equipment
- Large Skillet
- Large Bowl
- Tongs
- Chef’s Knife
- Cutting Board
- Measuring Cups and Spoons
- Spatula
- Kitchen Towel
Ingredients
- 3 cups romaine lettuce chopped
- 1.5 cups cooked chicken chopped, grilled, fried, or rotisserie
- 1/3 cup Caesar dressing
- 1/3 cup Parmesan cheese freshly grated
- 0.5 cup homemade croutons
- Kosher salt and freshly ground black pepper to taste
- 4 flour tortillas or wraps 10-inch
Instructions
- In a large bowl, combine the lettuce, chopped chicken, Caesar dressing, Parmesan cheese, and croutons. Use tongs to toss well. Season with salt and pepper to taste. Add more dressing if desired. Set aside.
- In a large pan, warm the tortillas over medium heat for about 15 to 30 seconds per side until pliable. Place on a plate and cover with a kitchen towel to keep warm. Alternatively, warm in the microwave between paper towels for 15 to 30 seconds.
- Place the tortillas on a clean surface. Divide the Caesar salad mixture between the tortillas, placing it in the center. Fold in opposite sides of each tortilla, then roll up burrito-style. Secure with a toothpick if needed. Cut in half or serve whole.


Leave a Reply